SharePoint Syntex was released in October 2020 and is looking to be a great product to make the most out of your content!
Integrated in Project Cortex, Syntex was developed with the goal of:
- Amplifying the specialty of each professional.
- Automating content processing.
- Transforming information into knowledge.
How does it propose to do that?
By allowing content experts to build AI Models with no code, thanks to the way SharePoint Syntex mainstreams machine teaching. This enables experts to train SharePoint Syntex to understand the content like they do, recognize key-information, and tag content automatically.
Once Syntex mainstreams machine teaching, AI models can be built much faster, needing only 6 documents to start obtaining good results.
There are two types of AI models to choose from: Form Processing and Document Understanding.
Form Processing
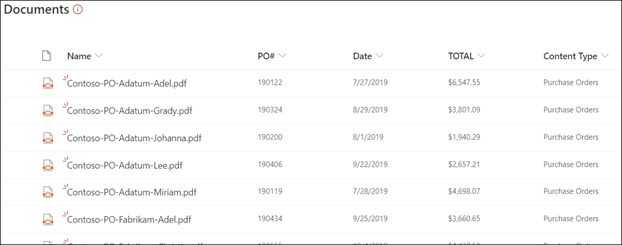
This type of model is used to extract information from structured or semi-structured files on a SharePoint document library, such as forms or invoices.
Using AI Builder, the model automatically recognizes and identifies key-value pairs. It’s also possible to manually identify some that may not have been detected.
The example below shows the key-value pairs automatically identified by the model.
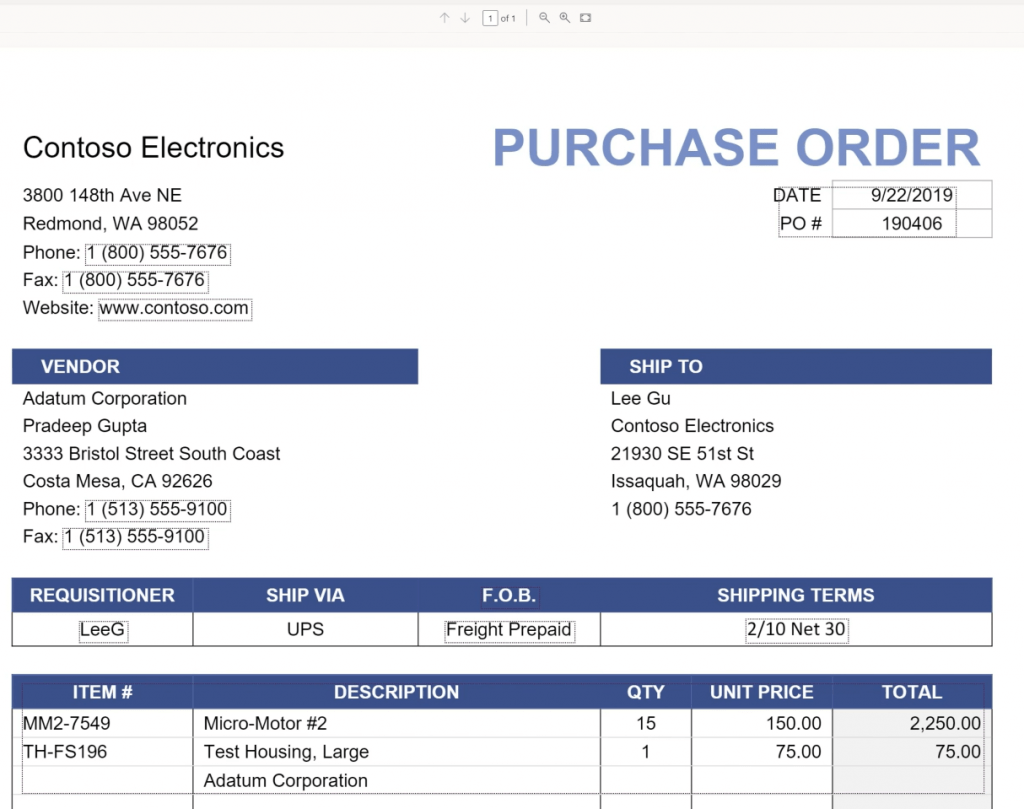
We use sample files to train the model and define the information to be extracted from the document.
After we train and publish the model, a Power Automate Flow is created. The flow runs when a file is uploaded to the SharePoint document library and extracts data identified in the model. The extracted data will be displayed in columns in the model’s document library view.

Document Understanding
This type of model is used to classify and extract information from non-structured documents, such as contracts and letters.
Syntex introduced a new SharePoint site named Content Center, where we can build and manage all our Document Understanding models as well as apply them to a SharePoint document library.
The Document Understanding model is comprised of two models:
Classifier – used to automate the identification and classification of a document type.
Extractor – used to extract specific information from documents.
We can have just one of the models working on our Document Understanding model.
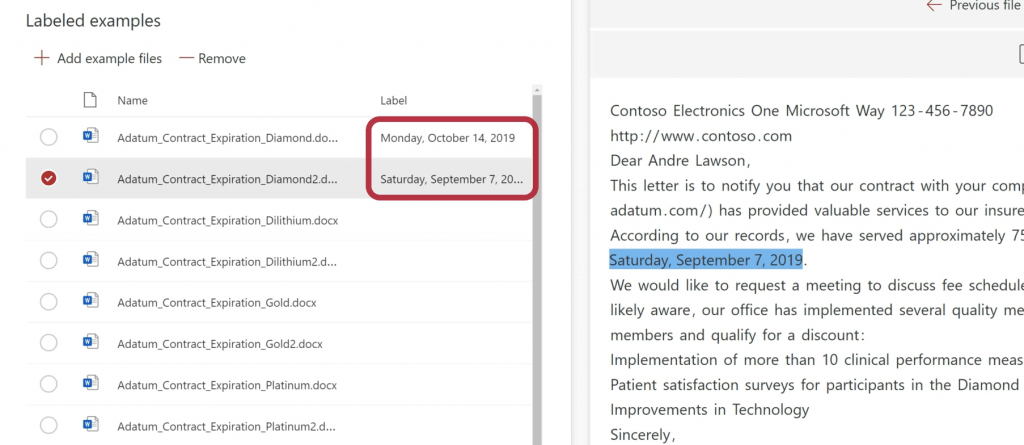
To start building a Document Understanding model, we need to create it on the Content Center and give it a name. After that, we must upload some sample files.
At this point, we can start building our classifier model. A new window will appear, displaying the content of the first uploaded file.
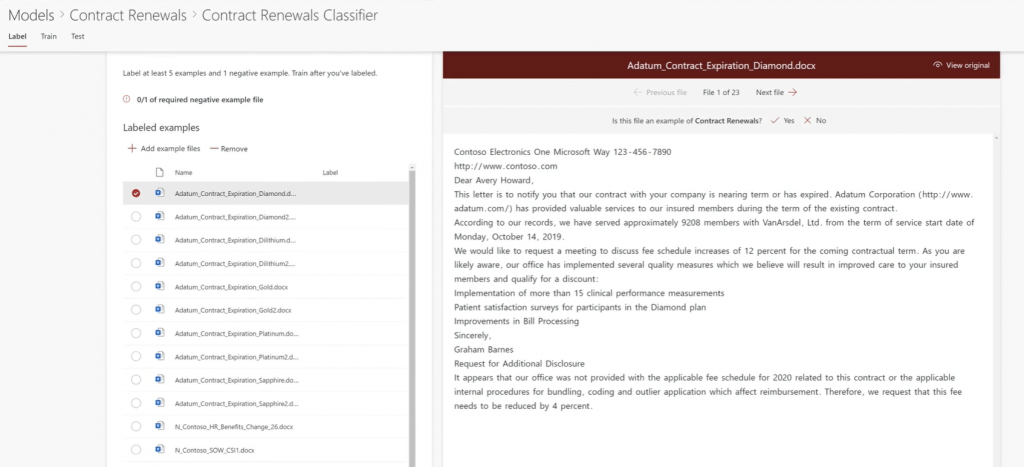
On top of the view, the model asks if this file is an example of the type of document we want to classify. After answering this question, the label is updated with the corresponding value on the left panel. We must evaluate the following files. The model requires that we label at least 5 examples and 1 negative example.
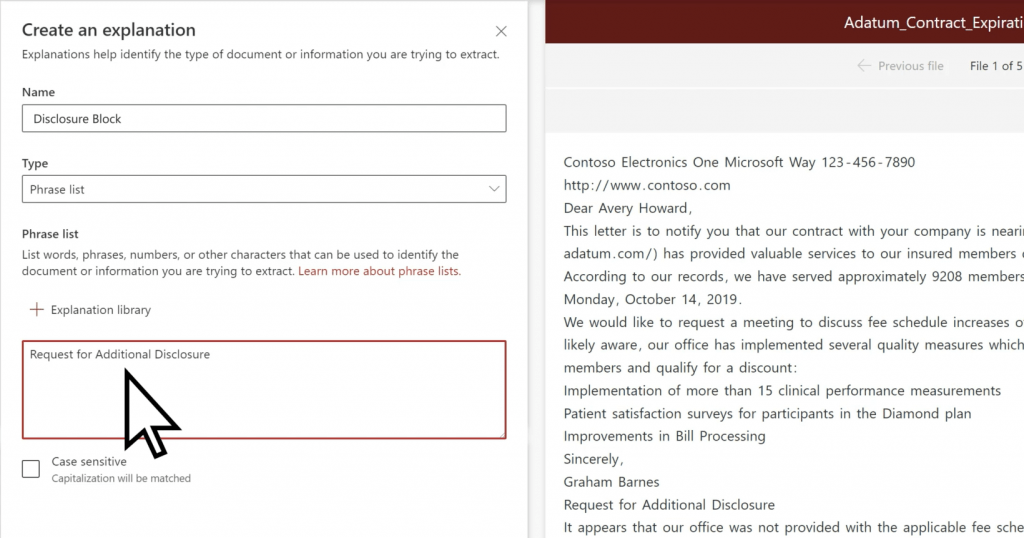
After this step, we have to create an explanation – a hint or clue to help the model recognize this type of document.
There are 3 types of explanations:
- Phrase list: a string of words, phrases, numbers, or characters that is consistently in the documents we are identifying.
- Pattern list: typically presented in different formats, such as dates, phone numbers, or credit card numbers. Makes our explanation more efficient by capturing any possible variations in the data we are trying to identify and extract.
- Proximity: helps our model identify data by defining how close another piece of data is to it.
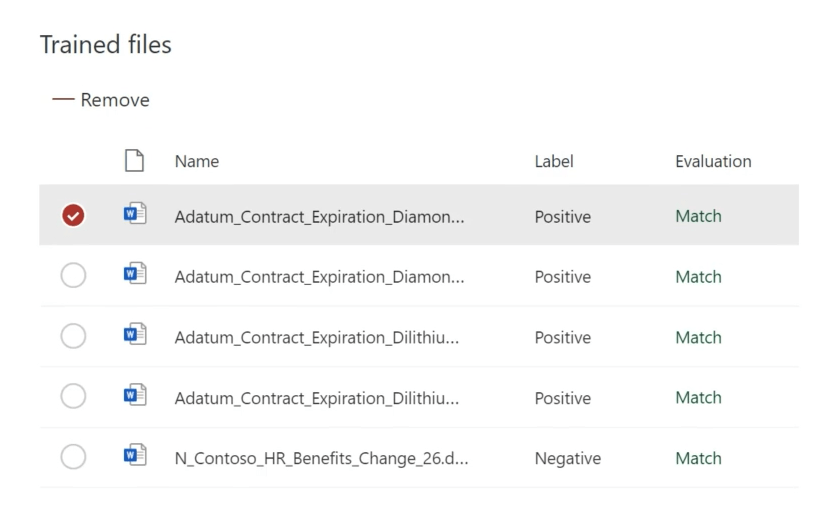
After we create one or more explanations, the model will test them on the files we previously evaluated and identify if they match our label or not. In the case of a mismatch, we should create another explanation to help the model recognize that file.
By this point, the model is ready to train itself on the remaining files.
The other model we can create, the extractor, has a building process similar to the classifier.
In the first step, we must identify the data to extract. This data is stored on the label tag.
Once more, we have to identify 5 positive cases (5 files that contain this data), and 1 negative case (1 file without this data).
In the next step, we create an explanation to help the model understand which piece of information it should extract. The model will then test the explanation with our labeling.
We can create multiple extractors, one for each type of information to extract.
After creating all our extractors and our classifier, we can test our model with the remaining sample files.
In the content center, we can then apply our model to one or more SharePoint Document Libraries. The files in these document libraries will be analyzed by the model and all data extracted, as well as the content type, will be displayed as metadata.
Sharing is caring!


1 Comment
carriersalescrmdesign · February 3, 2021 at 3:51 pm
Thanks for the information. Is there a way to force sync all existing files in a document library to the model?