Before we start, I recommend reading about Microsoft Teams Apps and, more specifically, about Microsoft Teams Custom Tabs.
Scenario
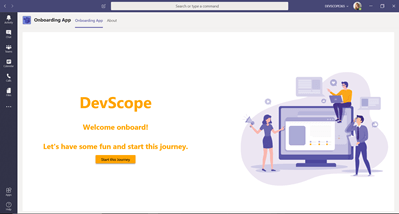
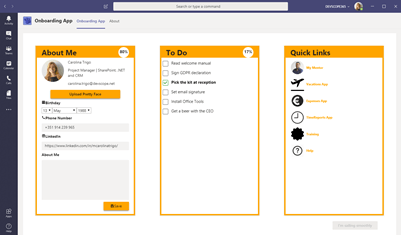
Microsoft Teams Tab for on-boarding a new employee in our company. The app should be able to get and set properties in the company’s Azure Active Directory (AAD) through Microsoft Graph. Opening the app for the first time should ask for user login and required consents.
Once logged in, the user should not be asked for it again (Single Sign-On) and should be redirected to the dashboard.
More about DevScope’s Onboarding App:
https://blog.devscope.net/2020/01/28/devscope-takes-2nd-place-at-the-microsoft-teams-challenge-2019/
Requirements and Plugins
- Microsoft Teams
- React JS
- Azure’s Active Directory (AAD) – We will need the Tenant ID and app Client ID
- Active Directory Authentication Library (adal-angular): https://www.npmjs.com/package/adal-angular
- Microsoft Teams JavaScript Library (@microsoft/teams-js): https://www.npmjs.com/package/@microsoft/teams-js
- Microsoft Graph JavaScript Client Library (@microsoft/microsoft-graph-client): https://www.npmjs.com/package/@microsoft/microsoft-graph-client
Getting Started
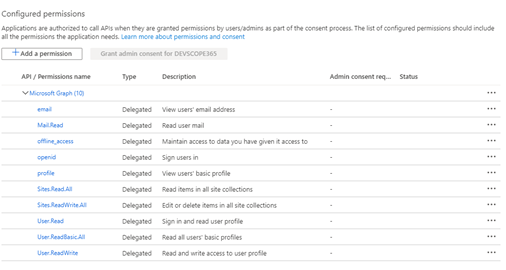
First, we should give our app registration some permissions, according to what we plan on doing with Microsoft Graph, here are some examples:
In our main tab we will initialize our graph client. For this we need to try and acquire a cached user and, if it exists, acquire that user’s access token and apply it to the client. We will need to import the required plugins and the AuthService and MSGraphService shown later.
import * as microsoftTeams from '@microsoft/teams-js';
import * as MicrosoftGraphClient from '@microsoft/microsoft-graph-client';
import {IMSGraphService} from '../services/MSGraphService/IMSGraphService';
import MSGraphService from '../services/MSGraphService/MSGraphService';
import AuthService from '../services/AuthService/AuthService';
To acquire the user’s access token we will use the MSGraphService and AuthService.
let graphService: IMSGraphService = new MSGraphService(new AuthService());

graphService.getAccessToken().then((token)=>{
	if(token){
		this.setState({accessToken:token});
	}
});
If there is an existing token we can initiate the Microsoft Graph Client, if not we must authenticate the current user in Microsoft Teams and retrieve a token.
this.msGraphClient = MicrosoftGraphClient.Client.init({
	authProvider: async done => {
		if (!this.state.accessToken) {
			const token = await this.getAccessToken();
			this.setState({
				accessToken: token
			});
		}
	        done(null, this.state.accessToken);
	}
});

//...

private async getAccessToken(): Promise<string> {
	return new Promise<string>((resolve, reject) => {
		microsoftTeams.authentication.authenticate({
			url: window.location.origin + '/auth-start.html',
			width: 600,
			height: 535,
			successCallback: (accessToken: string) => {
				resolve(accessToken);
			},
			failureCallback: reason => {
				reject(reason);
			}
		});
	});
}
MSGraphService
The MSGraphService is where we will implement a simple method getAccessToken which calls the AuthService getToken.
public getAccessToken():
        Promise<string>{
            return new Promise<string>((resolve, reject)=>{
                this.authService.getToken()
                .then((token)=>{
                    if(token){
                        resolve(token)
                    }
                    else{
                        resolve('');
                    }
                })
            })
        }
AuthService
In AuthService we will configure our Authentication Context, verify if there is a cached user and aquire a token, all in the getToken method mentioned above. Here is where we need to import ‘adal-angular‘.
import * as AuthenticationContext from 'adal-angular';The Authentication Context Options is where we will need our Tenant Id and app Client Id and can be configured like so:
const config: AuthenticationContext.Options ={
            tenant: "{INSERT YOUR TENANT ID}",
            clientId: "{INSERT YOUR CLIENT ID}",
            redirectUri: window.location.origin + "/onboardingTab",
            cacheLocation: 'localStorage',
            navigateToLoginRequestUrl: false,
            endpoints: {
                "https://graph.microsoft.com": "https://graph.microsoft.com"
              },
        };

const authContext = new AuthenticationContext(config);
To check for a cached user let’s create a private method called isUserCached.
private isUserCached(authContext: AuthenticationContext): boolean {
        var isCallback = authContext.isCallback(window.location.hash);

        if (isCallback && !authContext.getLoginError()) {
            authContext.handleWindowCallback(window.location.hash);
        } else {
            var user = authContext.getCachedUser();
            if (!user) {
                return false;
            } else {
                return true;
            }
        }
    return false;
}
Now we add some logic to check for a token in case there is a cached user. This will also check for a cached token.
return new Promise<string>((resolve, reject)=>{
    if(this.isUserCached(authContext)){
        let cachedToken =
            authContext.getCachedToken("https://graph.microsoft.com");
            if(cachedToken){
                resolve(cachedToken);
            }
            else{
                authContext.acquireToken(
                    "https://graph.microsoft.com",
                    (error, acquiredToken) =>{
                        if(error || !acquiredToken){
                            reject(error);
                        }
                        else{
                            resolve(acquiredToken);
                        }
                    }
                )
            }
        }
        else{
            resolve('')
        }
    })
Microsoft Graph Usage
Now we can use our app without the need to login every time we open it. We can use Microsoft Graph Client to, for example, get some of the logged in user’s details like birthday and job title.
private async getDetails(): Promise<void> {
	await this.msGraphClient.api('me')
	.select('birthday,businessPhones,aboutMe,displayName,jobTitle,mail')
	.get(async (error: any, user: any, rawResponse?: any) => {
	    if (!error) {
		this.setState(
		    Object.assign({}, this.state, {
			user: user,
			loaded: true,
			birthdate: user.birthday,
			phone: user.businessPhones[0],
			aboutMe: user.aboutMe
		    })
		);
                Promise.resolve();
	    } else {
	        this.setState(
		    Object.assign({}, this.state, {
			errorlog: error
		    })
		);
	    }
	});
}
And there we go! Now it’s up to you! Feel free to leave your suggestions and experience!


1 Comment
Bhuvanesh · May 20, 2021 at 11:07 am
Can you please provide the github repo url ?